


Building an ASP.NET MVC Project with Cassandra
Additional technical editing by Paul Lemke (@pyrox420)
and Joe Moses (@jnmoses)
Originally posted on Planet Cassandra 2015-08-15
Have you ever noticed something about code examples for working with Cassandra? They're (almost) all written in Java. While there are Cassandra drivers available for working with several languages, it can be challenging to find useful, working examples.
For those of us who use Cassandra with C# in the .NET world, this problem is all-too familiar. By and large, we are left scouring the second and (gasp) sometimes third pages of our Google searches. And often hoping that the links don't lead us to an unanswered question on Stack Overflow. When we inevitably come up with nothing, we are left to blaze our own trail.
This article is based on my journey while building a tool using ASP.NET MVC 5. I thought it would be helpful to write a quick tutorial on this subject. That way I could help others avoid the perils of augmenting a non-SQL Server model for their .NET Model/View/Controller (MVC) projects.
1. Create the Cassandra table
First, let's get our underlying Cassandra table ready. Assume that I want to build a simple table to keep track of data from the crew of Serenity (a-la Joss Wheedon's Firefly). I'll create a simple table definition in my “presentation” keyspace:
crewname text PRIMARY KEY,
firstname text,
lastname text,
phone text);
After inserting some data, I'll run a quick SELECT:
crewname | firstname | lastname | phone
----------+------------+-----------+--------------
Simon | Simon | Tam | 111-555-8899
Kaylee | Kaywinneth | Frye | 111-555-9866
Jayne | Jayne | Cobb | 111-555-3464
River | River | Tam | 111-555-8899
Wash | Hoban | Washburne | 111-555-1212
Mal | Malcolm | Reynolds | 111-555-1234
Zoey | Zoey | Washburne | 111-555-1212
Sheppard | Derial | Book | 111-555-2349
Inara | Inara | Serra | 111-555-2859
(9 rows)
2. Create a new ASP.NET MVC Project
Things are all set on the Cassandra side. Now, let's switch over to Visual Studio 2013, and create a new project. Under the Visual C# templates I'll select “Web” and then indicate that I want to create a new “ASP.NET Web Application.” Note that the templates available and options to create a new ASP.NET MVC project may vary depending on your version of Visual Studio.
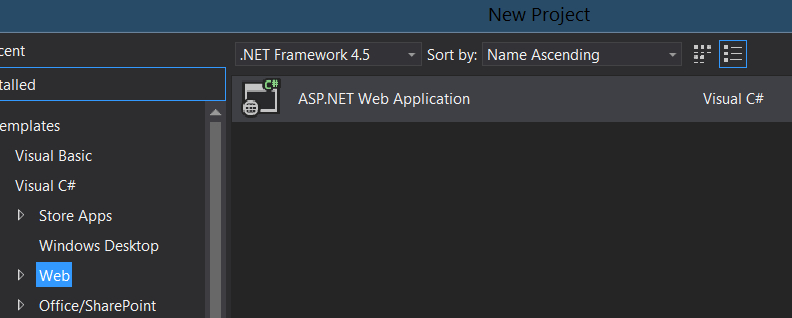
Figure 1. Creating a new ASP.Net Web Application.
After naming my project “ShipCrew” I will select the “MVC” template on the next dialog.
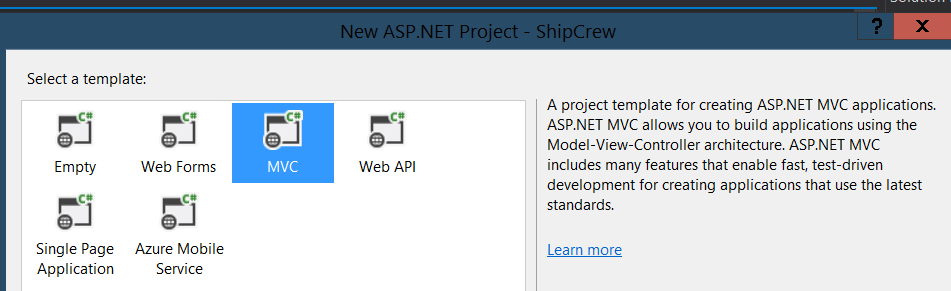
Figure 2. Selecting the MVC template for my project.
At this point, you may have noticed that the new project already contains some example files to support a few different types of sample applications. These applications will each have their own models, views, and controllers. As the focus of this tutorial is to demonstrate how to use Cassandra with ASP.NET MVC, I will skip the part where I recommend removing the example applications (oops).
3. Get the DataStax C# Driver for Apache Cassandra
In my Solution Explorer I will right-click on my project and indicate that I wish to “Manage NuGet Packages.” I'll enter “datastax” in the NuGet search input, and the DataStax Cassandra C# Driver package should be returned fairly quickly. From here I will indicate that I wish to install this package.
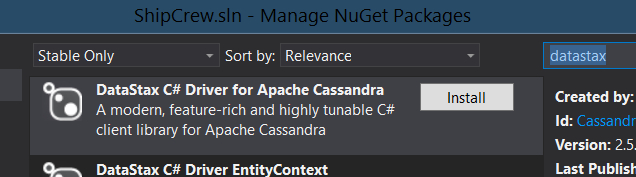
Figure 3. Installing DataStax C# Cassandra driver through NuGet.
4. Create the initial model, view, and controller files
Next in the Solution Explorer, I will right-click on the “Controllers” folder and indicate that I want to add a new “Controller.” When prompted to select the more-specific controller types, I'll just indicate that I want to add a “MVC 5 Controller – Empty.” I'll name it “ShipCrewController,” remembering that it is important for it to contain the word “Controller” on the end.
Now I will right-click on the “Models” folder in Solution Explorer, and add a new class. I'll name the class “ShipCrewModels.cs.” I'll make sure that I'm “using” the Cassandra.Mapping.Attributes library. This way I can use the “Table” annotation to specify the keyspace and table name to the driver's mapper component. After defining the properties (and ensuring that they match the column names in my table) the code will look like this:
public class ShipCrewModels
{
public string crewname { get; set; }
public string firstname { get; set; }
public string lastname { get; set; }
public string phone { get; set; }
}
With the Controller and Model in-place, the next step is to create the view. If you look at the code of the ShipCrewController.cs, it should look something like this:
{
// GET: ShipCrew
public ActionResult Index()
{
return View();
}
}
If you want to name your view something other than “Index,” you are free to do so. But for the purposes of this example, I'll just leave it like it is. Next I'll right-click on the “Index” method name, and a menu should appear. From this menu I will select “Add View”:
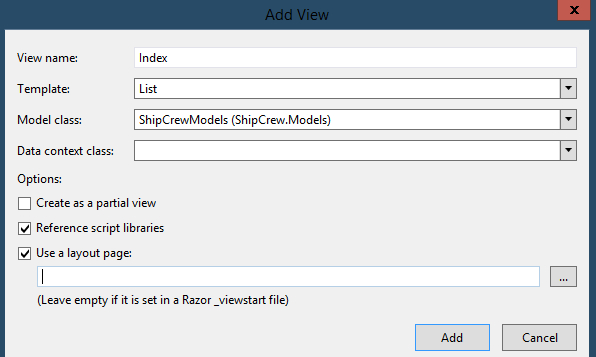
Figure 4. Right-click on Index and select “Add View...”
This next step is important. In the “Add View” dialog that pops up, the view name should be populated with the method name of my controller method. Since I want to be able to query Cassandra for multiple rows of data and display them, I'll select the “List” template. Next, I'll indicate the “ShipCrewModels” class as my “Model class.” Very important...I am going to leave the Data context class empty, since we are not using Entity Framework (EF). I will then click the “Add” button.
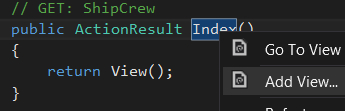
Figure 5. Add view dialog. Note that the “Data context class” field is left empty.
If you look at the code for the view that was just created, you'll see that Visual Studio has automatically generated a display page based on the ShipCrewModels class. This should also be representative of the “ShipCrew” Cassandra table created earlier.
5. Write the Cassandra data access classes and methods
Again, since we are not using SQL Server with Entity Framework (use of the EF pattern with Cassandra can lead to performance issues) I have some extra steps. First of all, I need to write a class to handle my Cassandra connection. Then I need a data access object (DAO) class to handle my DataStax driver methods, along with an interface for each class. I'll start by creating a new folder in the root of my project called “DAO.” This folder will hold my CassandraDAO and ShipCrewDAO class files.
Inside my CassandraDAO.cs, I'll start by creating a small interface in the same file:
{
ISession GetSession();
}
Next, I'll write the CassandraDAO class and have it use the ICassandraDAO interface. I'll make sure it has a no-argument constructor, and that it has private, static variables for Cluster and Session. This is important, as the best practice for working with the DataStax C# driver is to create these kinds of objects once, and reuse them. I will also create methods to allow the Cluster to be set, as well as to expose the Session.
{
private static Cluster Cluster;
private static ISession Session;
public CassandraDAO()
{
SetCluster();
}
private void SetCluster()
{
if (Cluster == null)
{
Cluster = Connect();
}
}
public ISession GetSession()
{
if (Cluster == null)
{
SetCluster();
Session = Cluster.Connect();
}
else if (Session == null)
{
Session = Cluster.Connect();
}
return Session;
}
Lastly, I'll define methods to connect to my cluster, as well as a quick “getter” for the “appSettings” section of my web.config. Note that for this to work properly, I will also have to define appSettings (in my web.config) for “cassandraUser,” “cassandraPassword,” and “cassandraNodes.”
{
string user = getAppSetting("cassandraUser");
string pwd = getAppSetting("cassandraPassword");
string[] nodes = getAppSetting("cassandraNodes").Split(',');
QueryOptions queryOptions = new QueryOptions().SetConsistencyLevel(ConsistencyLevel.One);
Cluster cluster = Cluster.Builder()
.AddContactPoints(nodes)
.WithCredentials(user, pwd)
.WithQueryOptions(queryOptions)
.Build();
return cluster;
}
private string getAppSetting(string key)
{
return System.Configuration.ConfigurationManager.AppSettings[key];
}
With that finished, I will now build my ShipCrewDAO class in a similar manner. First, I'll create the IShipCrewDAO interface in the same file, enforcing the implementation of a “getCrew” method. I also want that method to be asynchronous, so I will use the “Task” class of type “IEnumerable
{
Task
}
I'll create my ShipCrewDAO class next, instructing it to inherit from my IShipCrewDAO interface. It will have “protected” variables for the session and mapper, as well as the implementation of “getCrew.”
{
protected readonly ISession session;
protected readonly IMapper mapper;
public ShipCrewDAO()
{
ICassandraDAO cassandraDAO = new CassandraDAO();
session = cassandraDAO.GetSession();
mapper = new Mapper(session);
}
public async Task
{
return await mapper.FetchAsync
}
}
6. Modify the controller to use Cassandra
Now I can revisit my ShipCrewController code. First, I'll create a private static variable for the DAO, as well as a getter for it. The getter will also check whether or not the DAO is null, and instantiate it if it is.
protected IShipCrewDAO shipCrewDao
{
if (dao == null)
{
dao = new ShipCrewDAO();
}
return dao;
}
At this point, I will also change the “Index” method. As I want it to be called asynchronously, I will alter the return type to be Task
{
IEnumerable
return View(“Index”, shipcrew.ToList());
}
Note that my DAO is defined as a static variable. By doing this, I am making the application aware of my Cassandra connection as a static object, so it will not need to create a new connection for every request. If you are going to build your MVC/Cassandra application into a solution with multiple projects (potentially sharing a single connection), you may need to use the SimpleInjector to accomplish this. In that case, take a look at the “SimpleInjector” branch in my GitHub repository for more information.
7. Ready to rock!
At this point, I should be able to run my ASP.NET MVC application in my browser. After clicking the “Start” button in Visual Studio, the default page will show up. I’ll modify the URL to "localhost:63252/ShipCrew/Index” and the page with my data should come up. Note that the first folder should match the controller name (minus the word “Controller”) of “ShipCrew.” And I have not renamed my view, so the word “Index” should follow it (after a slash, of course). When the page loads, you should see something similar to this:
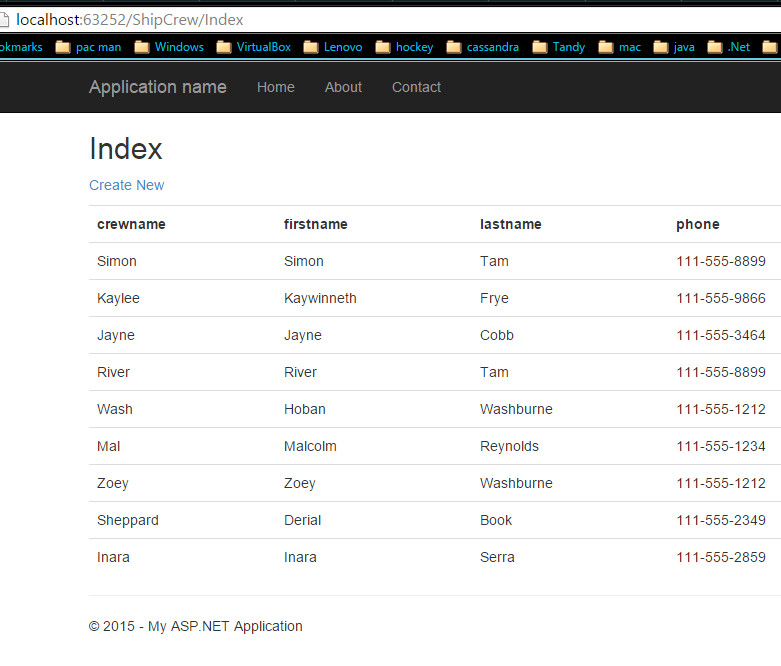
Figure 6. Finished product! Well, sort of.
Of course, there is still work to be done to round-out the final page. There’s plenty that can be removed or altered to fit my requirements. But at this point I do have a simple, working ASP.NET MVC 5 application displaying data from Cassandra.
The complete code for this tutorial can be found in my GitHub repository at github.com/aploetz/ShipCrew. DataStax's Luke Tillman has also created some useful resources for developers building Cassandra applications with C# in the .NET world:
- Developing with Cassandra on Windows - Steps for getting Cassandra to run in your Windows development environment.
- KillrVideo - A sample Cassandra application built with C# in the Azure cloud.
Happy coding!